Monitor Lights

|
Description
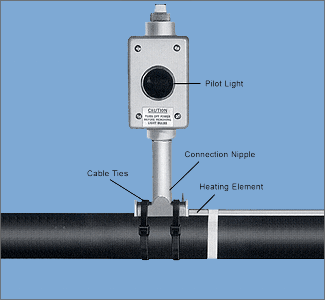
The 1556 monitor lights provide a means for continuity monitoring of the 2000, 2300, and 2700 Series self-regulating heating elements. The monitor lights are supplied complete with connection nipple and all necessary components to install the unit onto a pipe quickly and easily. The monitor lights are Factory
Mutual approved for use in Class I, Division 2, Groups B, C, D;
Class II, Division 2, Groups F and G; Class III, Division 2 areas.
|
| Installation
Instructions 1. Insert approximately 8" of heating element through the connection nipple. 2. Set the connection nipple on the pipe surface and fasten to pipe with cable ties. 3. Screw on the monitor light box and remove cover. Pull heater end outside box. 4. Separate the bus wires of the heater by cutting down the center about 2". Carefully strip insulation from the individual bus wires approximately 1/2" 5. Connect the bus wires directly to the screws on the light fixture. 6. Fill the connection nipple with the silicone rubber sealant. 7. Push the wires into the box and mount the light fixture into the box with screws. 8. Screw the cover onto the box and attach caution label to cover and install pipe plug. Installation Procedure for Grounding the Braided Heating Element in Class I Division 2 Areas Strip back metal braid about 7" from end of heater. Insert heater through the connection nipple pulling the braid under the nipple below the grounding screw. Cut off about 5" of the braid and attach the ring tongue connector to the remaining braid and fasten to nipple with the grounding screw. |
|